
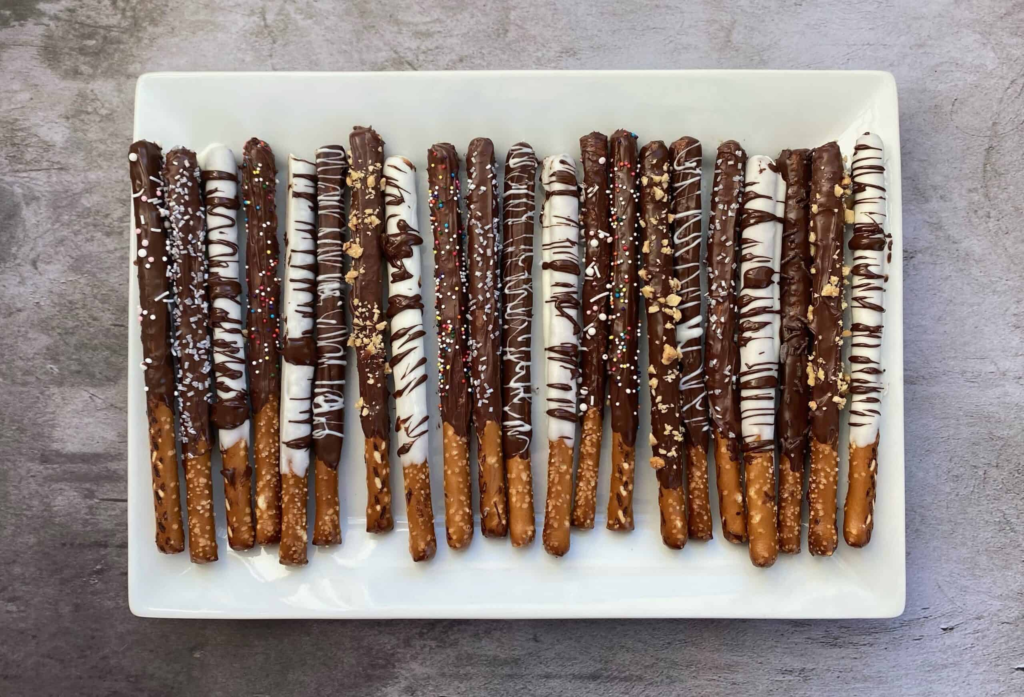

Do you love the match of sweet chocolate and salty treats? Sweet and salty snacks are popular everywhere because they satisfy two cravings at once. Chocolate covered pretzels are one of the most famous snacks in the world. They bring together crispy pretzels and smooth melted chocolate. You can enjoy them at holiday parties, family movie nights, or quick afternoon snack times. Kids love making them because the process is simple and fun. Adults love them because they look fancy on a party platter. In this helpful guide, you will learn how to make these wonderful treats right in your own kitchen. We will cover the best chocolate types, easy dipping steps, fun topping ideas, and smart storage tips. Get ready to impress your friends and family with homemade treats that taste amazing!
The Fascinating History of Sweet and Salty Pretzels
People have enjoyed twisted bread snacks for hundreds of years. Monks in Europe created the first twist shape to represent arms crossed in prayer. Over time, bakers learned to bake them until they were hard and crunchy. Hard snacks stayed fresh for a long time, which made them popular for travel. In the twentieth century, creative bakers started dipping salty snacks into sweet melted cocoa mixtures. The contrast between crunch, salt, and smooth sweet coating was an instant hit. Today, chocolate covered pretzels are a classic American snack enjoyed by millions. You can buy them in store bags, but homemade versions taste much fresher. Making them at home lets you pick your favorite chocolate quality and custom toppings.
Quick Recipe Overview and Quick Details Table
Before you start dipping, here is a quick overview of the recipe details and nutritional facts. Having your items organized makes baking smooth and fun.
| Category | Recipe Details |
| Prep Time | 15 minutes |
| Chilling Time | 20 minutes |
| Total Time | 35 minutes |
| Difficulty | Very Easy |
| Serving Size | 24 pretzel twists |
| Main Ingredients | Pretzels, Melting Chocolate |
| Equipment | Microwave bowl, Wax paper |
| Storage Method | Airtight container at room temperature |
| Shelf Life | 2 to 3 weeks |
| Calories Per Serving | 110 kcal |
Choosing the Best Ingredients for Dipping Success
To make great snacks, you need good ingredients. You can use twist shapes, long rods, or waffle grids. Hard sourdough snacks offer a great crunch, while thin twists are easy to bite. Next, pick your coating carefully. High-quality chocolate chips or melting wafers work best. High-grade chocolate contains real cocoa butter, which melts smoothly and tastes rich. You can use dark, milk, or white varieties. Milk varieties give a classic sweet taste, while dark cocoa offers a rich flavor. White cocoa is sweet and lets you add food coloring for holidays. Adding a tiny bit of coconut oil helps the coating melt evenly and stay shiny.
Essential Tools Needed in Your Kitchen
You do not need fancy kitchen tools to make these treats. First, grab a large microwave-safe glass bowl for melting. Glass holds heat well and spreads warmth evenly. Next, grab parchment paper or wax paper to line your baking sheets. Parchment paper stops the wet snacks from sticking as they cool down. You will also need a fork or a dipping utensil. A fork lets extra liquid drop back into the bowl easily. Spatulas help you scrape down the sides of your bowl so nothing goes to waste. Having these basic tools ready on your counter keeps your cooking space clean and organized.
Step by Step Guide to Melting Your Sweet Coating
Melting your coating correctly is the most important step in this recipe. Water is the biggest enemy of melted cocoa because a single drop makes it hard and lumpy. Make sure your bowl and tools are completely dry before starting. Place your cocoa chips into your dry glass bowl. Heat the bowl in your microwave for thirty seconds at a time. Take the bowl out and stir the contents gently after every heat cycle. Stirring spreads the heat and prevents burning. When the mixture is almost smooth, stop heating and just keep stirring until it melts fully.
The Double Boiler Method for Extra Control
If you do not want to use a microwave, use a double boiler instead. Fill a small pot with two inches of water and bring it to a low simmer. Place a heat-safe bowl over the pot, ensuring the water does not touch the bottom of the bowl. Put your cocoa into the bowl and stir constantly. The gentle steam heats the bowl slowly, which prevents burning. This method gives you complete control over the temperature. It is perfect when you are working with white cocoa, which can burn quickly. Once smooth, remove the bowl from the heat and start dipping right away.
Master the Perfect Dipping Technique
Now comes the fun part! Line a flat cookie sheet with wax paper. Pick up a hard pretzel with your fingers or tongs. Lower it halfway into the liquid for a neat look, or drop it in fully for complete coverage. Use your fork to lift the snack out of the bowl gently. Tap the fork against the edge of the bowl a few times. Tapping removes extra drops and creates a smooth coat. Slide the bottom of the fork against the bowl lip to stop drips. Carefully lay the coated snack onto your parchment paper to set.
Creative Toppings to Decorate Your Treats
Adding toppings makes your chocolate covered pretzels look like they came from a fancy candy store. You must add toppings while the coating is still warm and wet. If you wait too long, the toppings will fall off. Rainbow sprinkles are great for birthday parties and holiday celebrations. Crushed peppermint candies add a cool crunch for winter events. Chopped peanuts, pecans, or walnuts bring extra salty flavor. You can also drizzle melted white cocoa over dark coatings to make cool geometric stripes. Let your kids help decorate to make fun family memories in the kitchen.
Proper Cooling and Setting Techniques
After decorating your snacks, they need time to harden completely. You can let them sit at room temperature for about one hour. Room temperature cooling gives the coating a nice shine and firm snap. If you are in a rush, place the tray in your refrigerator for fifteen minutes. Do not leave them in the fridge for too long, or moisture will form on top. Moisture makes the surface look dull and sticky. Once the coating is firm to the touch, gently peel the snacks off the parchment paper. They are now ready to serve or pack!
How to Store Your Snacks for Maximum Freshness
Proper storage keeps your chocolate covered pretzels fresh and crunchy for weeks. Place the finished treats inside an airtight plastic container or glass jar. Layer wax paper between rows so they do not stick together. Store the container in a cool, dry pantry away from direct sunlight and heat sources. Warm rooms will melt the coating and make a sticky mess. Do not store them in the freezer because freezing creates ice crystals. When ice thaws, it turns the hard snack soft and soggy. Stored correctly at room temperature, these treats stay delicious for three full weeks.
Fun Variations for Holidays and Special Events
You can change this recipe to match any holiday throughout the year. For Valentine’s Day, use white cocoa with red sprinkles and pink drizzles. For Halloween, use orange-dyed coating and dark cocoa stripes. For Christmas gifts, pack white and dark dipped snacks into clear gift bags tied with red ribbon. You can also make caramel stuffed versions by wrapping soft caramel around the hard pretzel before dipping it in liquid cocoa. These fun variations make great homemade gifts for teachers, neighbors, and friends during the festive holiday season.
Troubleshooting Common Dipping Mistakes
Sometimes things go wrong when working with warm sweets, but fixes are easy. If your melted mixture feels too thick, stir in half a teaspoon of coconut oil or vegetable shortening. Never add water or liquid milk, or the mix will ruin instantly. If your coating looks dull or white streaks appear, the mixture got too hot. You can fix the look by adding extra sprinkles or a nice white drizzle over the top. If your pretzels get soft, your storage container was not sealed tightly. Always use fresh, crisp snacks from a brand-new bag for the best crunch.
Frequently Asked Questions
Why did my melted cocoa get hard and grainy?
Your cocoa seared from high heat or came into contact with a drop of water. Always heat in short thirty-second bursts and keep all tools totally dry.
Can I use white chocolate chips for dipping?
Yes, you can use white chips! Add a tiny bit of coconut oil while heating because white varieties melt at lower temperatures and scorch easily.
How long do these treats stay fresh?
They stay fresh and crunchy for up to three weeks when kept in an airtight container at room temperature away from heat and light.
Should I freeze my dipped snacks to set them faster?
It is better to use the refrigerator for fifteen minutes. Freezing creates moisture that makes the hard snack center soft and soggy when thawed.
How do I keep extra toppings from falling off?
Sprinkle your toppings immediately after dipping while the coating is wet. If the coating hardens, toppings will not stick to the surface.
What is the best shape for dipping?
Rods are the easiest for beginners to dip, but classic twists and grid waffles hold toppings very well and look great on party trays.
Conclusion
Making homemade chocolate covered pretzels is a simple, fun, and tasty activity for any home baker. With just a few ingredients, you can create sweet and salty snacks that rival high-end shop treats. Remember to heat your coating gently, tap off extra drips, and decorate before the surface sets. Store them in a sealed container so they remain crunchy for weeks. Now that you know all the secrets, gather your tools and start dipping today! Share your tasty creations with friends or package them up as thoughtful gifts for your loved ones.